What’s the best Grinder for Pourover

What’s the best Grinder for Pourover

6 different conical burr grinders in one image

Best coffee grinders for pour over

There are dozens of choices for grinding coffee, from cheap to expensive, so what is the best grinder for pourover?

A person may wonder: “What’s the best grinder for pourover?” After some consideration, the first breakdown is blade v.s. conical burr grinder. You can eliminate a blade grinder right away. The blades do not grind evenly, you’ll end up with varying sizes of ground coffee, which will effect extraction, which will effect flavor. One day you get a weak cup, another a bitter cup. So don’t bother with blade grinders.

Having eliminated blade grinders, the next criteria is cost. You can get a good conical coffee grinder by Cuisinart for $60, all the way up to the Fellow Ode Brew Grinder for $299. You shouldn’t spend anymore than $300, and even that is excessive for pourover, but don’t even got that far.

If you have an espresso machine, or plan on buying one, you should know that there are not any burr grinders that do both well. So you’re looking at two grinders. And espresso is beyond the scope of this site. Check Coffee Cosmos for information on coffee styles outside of Pour-over. DO NOT BUY A GRINDER THAT PROMISES THAT IT GRINDS ESPRESSO AND POUR-OVER, it just can’t do both well. 

So what’s the best grinder for pourover?

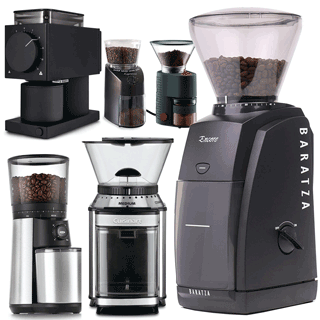
If you’re restricted by a budget go for the Cuisinart, it’s a real workhorse and grinds well enough for most pour-over drinker’s palates. Bodum, OXO, Capressso make good burr grinders that come in at around $100, but if you’re going to spend that amount, it’s makes sense to chip in an extra and get the Baratza Encore Conical Burr Grinder. Reviews across the internet show it’s the best grinder for the price.

Watch the reviews here.

Get a Complete Pour-over Coffee Setup for Under $100

Get a Complete Pour-over Coffee Setup for Under $100

Get a Complete Pour-over Coffee Setup for under $100!

Now the the global Covid-19 epidemic, and the subsequent quarantine, getting the awesome coffee we’re used to, is much harder and potentially dangerous. But it doesn’t have to be like that—if your automatic coffee machine is bumming you out, and with espresso hard to prepare correctly and worse, the machines are spendy. Here’s a list to help you get get a complete pour-over coffee setup for under $100.

Getting a decent pour-over coffee brewing set-up from scratch can be spendy if you go with the top of the line brands like Hario, Kalita, Baratza, etc. But there are options to fit the frugal budget, that quite frankly, will produce an excellent cup of pour-over coffee. So check this article for a list and links to the gear you need for an affordable pour-over coffee setup.

Best Water Temperature for Pour-over Coffee

Best Water Temperature for Pour-over Coffee

202°F is the best boiling point of water for Pour-over Coffee brewing.

Depending on elevation (barometric pressure), water boils at different temperatures. The higher in elevation you are, the lower in temperature water boils; At one atmosphere (sea level) the boiling point of water is 212°F or 100°C. Often you’ll hear that the best water temperature for brewing pour-over coffee is “just off the boil”, but depending on elevation, that boiling point would be different, which is not really optimal for pour-over coffee extraction. Boiling point of water for Ppour-over coffee brewing should be 202°F, not 211°F-203°F.

According this TEDxCoeurdalene video of a talk by Scott Yost, of DOMA Coffee, 202° is the perfect temperature for pour-over coffee extraction. Since seeing that video a couple years ago, we’ve been setting our Bonavita Automatic Kettle at 202°, which seems to be producing the best extractions. After a recent trip we found ourselves at over 6,000 feet above sea level, the water was boiling at around 202° so we were technically using boiling water on the coffee. The water temperature, while boiling, was still 202°. The main thing is that the water shouldn’t be hotter than 202°.

Just off the boil is misleading if you really want the best extraction. Accurate temperature readings combined with a proper coffee grind will work the best for pour-over coffee. But you’ll need some way for accurate temperature gauging. A good kitchen thermometer or a kettle that you can set the temperature with, will provide the accuracy you’ll need for the best cup of pour-over coffee.

For the best pour-over coffee brewing results:

  1. Correct Water Temperature
  2. Properly Ground Coffee

Happy brewing!

Hario V60 vs Kalita Wave Coffee Dripper

Hario V60 vs Kalita Wave Coffee Dripper

Kalita 185 vs Hario V60 pour over coffee drippers
The Hario V60 vs Kalita Wave Coffee Dripper smackdown!

Hario V60 pour-over coffee dripper has been the Champion of pour-over coffee brewing among aficionados for decades. But now there is challenger in the ring going after the belt. We pit the Hario V60 vs Kalita Wave coffee dripper to find out which is better.

pourover-coffee-world-kalita185-basketThe Kalita Wave dripper, made in Japan, offers a different process of drip coffee brewing. Most noticable is the flat bottom basket, rather than cone-shaped like the Hario V60. The brewing process is a little more like a Vietnamese coffee in that the coffee steeps a little longer. The result is a longer extraction time than what you typically get with a Hario V60 coffee dripper, which has a large single hole, and lots of bam bam!

pourover-coffee-world-kalita185-dripsCoffee passes through the grounds faster in the Hario V60. The flat bottom and three tiny holes cause the water to pass through the Kalita Wave coffee dripper slower. Since the extraction is longer, more flavors and oils come out of the grounds.

Speed had Kalita Wave on the ropes at first, we were able to drink our cup sooner from the Hario V60. But Kalita came on strong in the later rounds and the fuller flavor won out.

Conclusion

pourover-coffee-world-kalita-wave185-boxKalita Wave was a tough challenger against Hario V60, a solid defender, and after going head to head for over a year now, we give the edge to Kalita Wave for a richer, fuller flavor pour-over coffee. This is not to suggest that using the Hario V60 is bad, Hario threw it down and is still a great pour-over coffee dripper who is not ready to hang up the pour-over coffee gloves. We use the V60 frequently. In the final round the differences were subtle. And one brewer probably suits certain types of beans and roasts over the other. Keeping that in mind you’ll have be the judge.

The Kalita Wave comes in stainless steel, glass and ceramic. Since we’re prone to breaking drippers, we recommend the stainless. There a two sizes are available, #155 and the #185, the #155 is fairly small and can’t hold much more that 10-15 grams of coffee grounds. The #185 is similar to the Hario V60 in capacity and will perfect for normal everyday brewing.

To purchase the Kalita Wave #185 coffee dripper shop here

Check out our quick look at the Kalita Wave 185 Pour-over Coffee Dripper:

SaveSave

Water to Coffee Ratio for Pour-over Coffee Brewing

16-parts water to 1-part coffee

Always start with good fresh-roasted coffee and filtered water; successful pour-over coffee brewing comes down to ratios. For pour-over coffee brewing, the water to coffee ratio of 16 parts (grams) water to 1 part (grams) coffee is a good place to start.

Note: To measure and brew pour-over coffee properly, you need a good scale. While most digital kitchen scales will do the trick, a dedicated pour-over coffee brewing digital scale with a built-in timer is worth the investment. More information and purchasing choices on digital scales can be found in this article.

Experiment on the ratios to adjust for your taste; try 15:1 or 17:1 to find the ratio the best suits your taste. Enjoy!

How to Brew Pour-Over Coffee

how to brew pour over coffee

Items needed:

  • Goose-neck drip kettle
  • Cone style coffee dripper
  • Paper filters
  • Digital kitchen scale
  • Burr coffee grinder
  • A cup or decanter
  • Kitchen thermometer
  • Heat the water

How to Brew Pour-over Coffee

Getting a great cup of coffee requires the right brewing equipment, fresh roasted coffee and a perfected pour-over coffee technique. This article is about how to brew pour-over coffee. Successful pour over coffee brewing is a mater of mastering a few steps. Fresh-roasted coffee, good filtered water, certain items for brewing: burr grinder, pour-over coffee dripper, paper or cloth filter, scale, gooseneck kettle, some people like to brew into a decanter, but straight into a cup works.

Start with the grind. You need an even grind to get good results, a good conical burr grinder will do this.

Heat water. Optimal temperature is 202º F or 65º C. But just off the boil if your boiling point is 212º is ok if you don’t have a thermometer. Heat water in a pot on the burner, transfer to a gooseneck kettle for the pour for control.

Slow pour. First bloom your grounds in the basket. No more than 80-100 grams at a time. After 1 minute or so after the grounds settle, start the main pour in increments of 80-100 grams at a time. Be sure to not add more water than coffee per the ratio. Don’t pour all the water at once, do it gradually.

Detailed instructions under the fold:


Bring the water to a boil then remove from the heating element. If you are using a temperature controlled electric kettle, just bring it up to a preset temp and hold. The optimal temperature is in the 198-201 degree range (depending on altitude, water will boil at a lower temperature).

Rinse the paper filter

Place the filter in the cone. Be sure to fold the seams over flat to make the filter sit better in the cone. Rinse your paper filter with the some of the heated water.

Grind and measure the coffee grounds

Weigh out the fresh beans to a 1:16 ratio, in grams, coffee to water. Experiment with ratios to suit taste. Grind to a medium-fine texture, the ground coffee grains should be about the size of sand. Note: A courser grind will cause the coffee to under-extract, resulting in a watery cup of coffee, too fine of a grind and the grounds will over-extract and taste bitter. Place your cup or decanter on the kitchen scale and zero (Tare) it. Add the coffee to the filter, level and slightly indent the center.
Zero the scale.

Bloom the coffee

Pre-infuse the coffee first. Pour 40-60g of hot water into the center of the grounds and work your way out, in expanding circles, until you reach the edge of the grounds. Some people recommend that you stop short of the edge leaving a 1/8 inch or so of the coffee dry. It probably doesn’t make a difference.

Let sit for 45-70 seconds. Note: the fresher the beans the more the grounds will expand as they release gases, older roasted coffee may not bloom at all. Let the bloom deflate before adding more water.

Start the main pour

After blooming, start the main pour, beginning from the center, pour the remaining water into the cone. Some like the do this in stages, pour, rest, pour, rest, etc. This should take around 2-3 minutes. Try to keep the water level above the coffee grounds, keeping oxygen from coming into contact with the coffee before you finish the pour. Take your time

Enjoy your cup!

Practice makes perfect! With good fresh coffee, proper equipment and technique you’ll be a pour-over master in no time.

Things to remember:

Grind
Measure
Bloom
Pour slowly

Watch this video and if you like please consider subscribing to our YouTube channel